Create an entry record
Note
You must have an account with the management role to execute the actions below.
This guide shows you how to create an entry record. If you're not familiar with what an entry record is, read concepts first.
Prerequisite
To create an entry record, there must be at least one product model with a main component in the system. If there isn't one, follow the steps in how to get system ready before continuing.
Steps
Step 1: Log in as manager
Navigate to the landing page and log in using your credentials.
Note
If you forgot your password, follow the steps in how to reset my password.

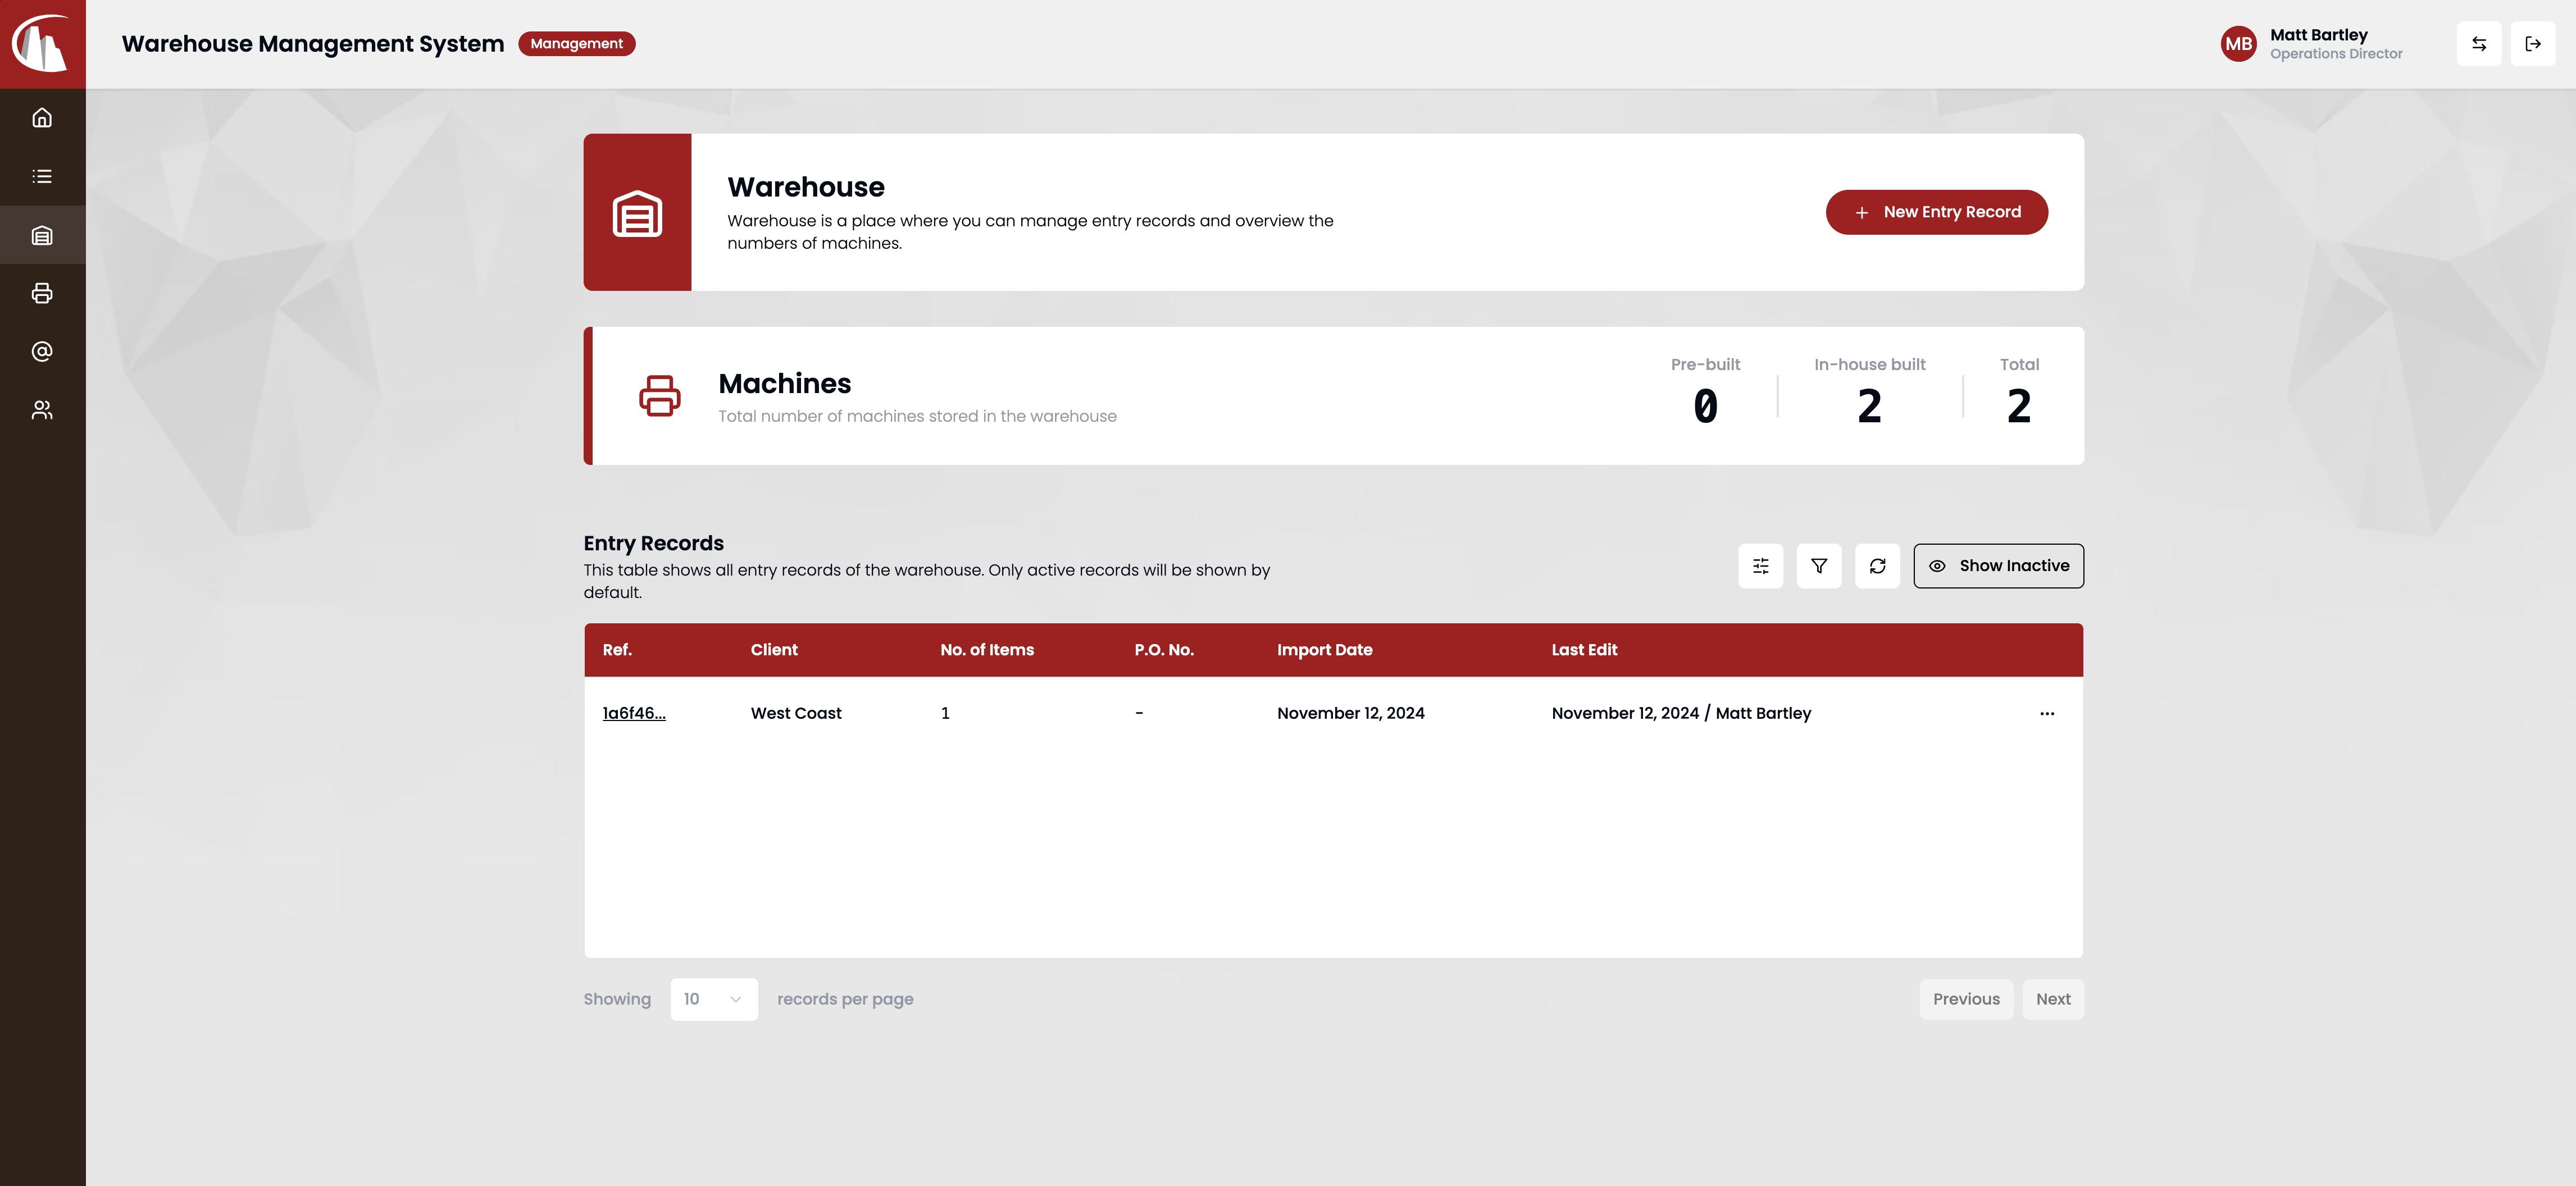
Step 2: Navigate to /warehouse
Click the Warehouse button on the left-hand-side menu bar, then click the button New Entry Record in the header.
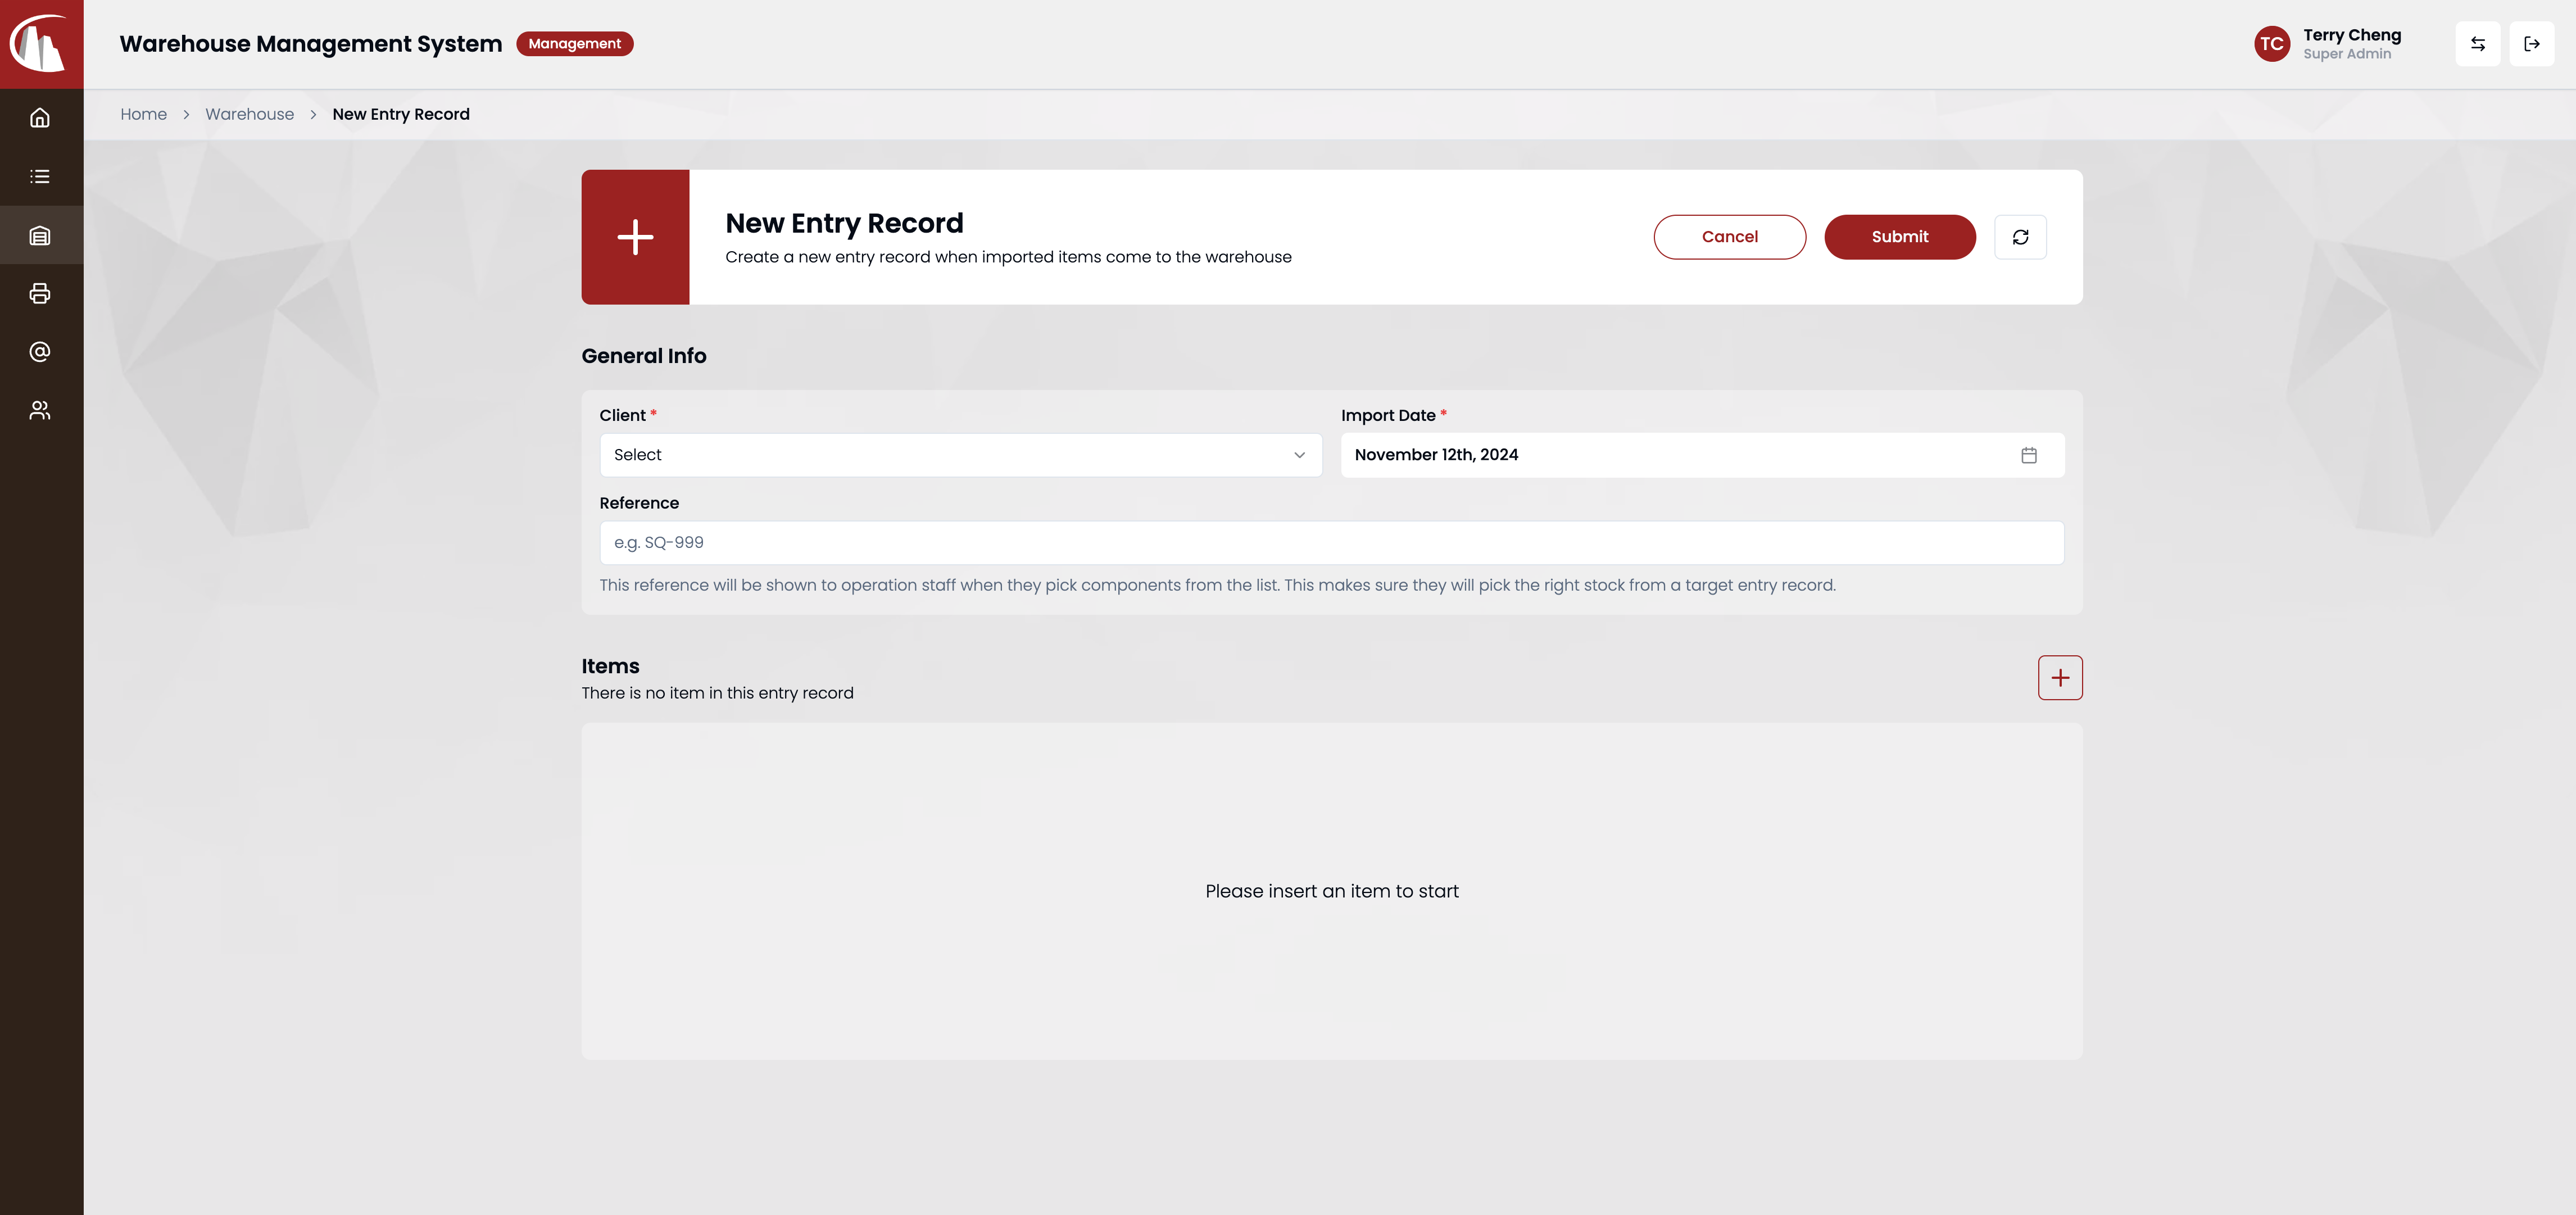
Step 3: Click New Entry Record
You'll land on a page where you can enter details of the new entry record. First, fill in the General Info part.
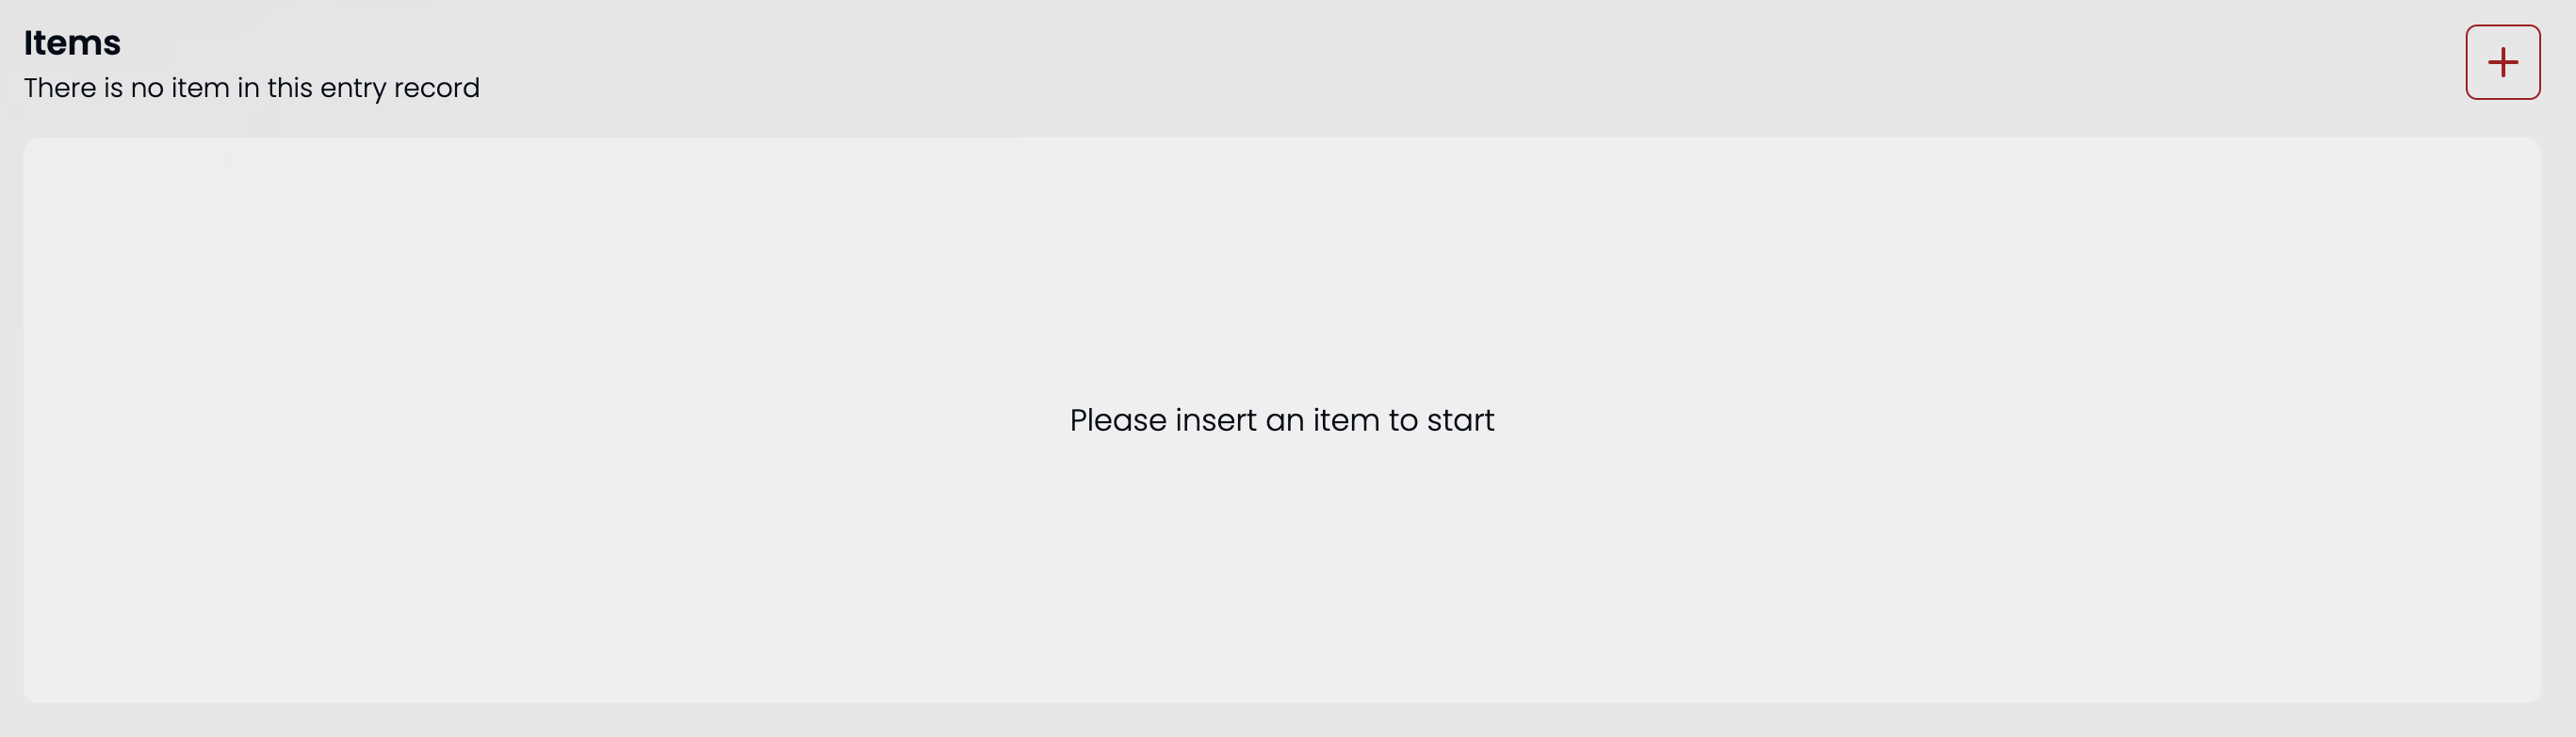
Step 4: Input items details
Warning
You must have at least one item in the record before you submit.
Note
Items cannot be removed after creation, but you can edit them.
Click the + button above the item list to start filling in the details for each item.
There are two types of items.
Pre-built items
If you check the pre-built toggle, the quantity will be fixed at 1, all you need to do is to enter the serial number of the pre-built machine.
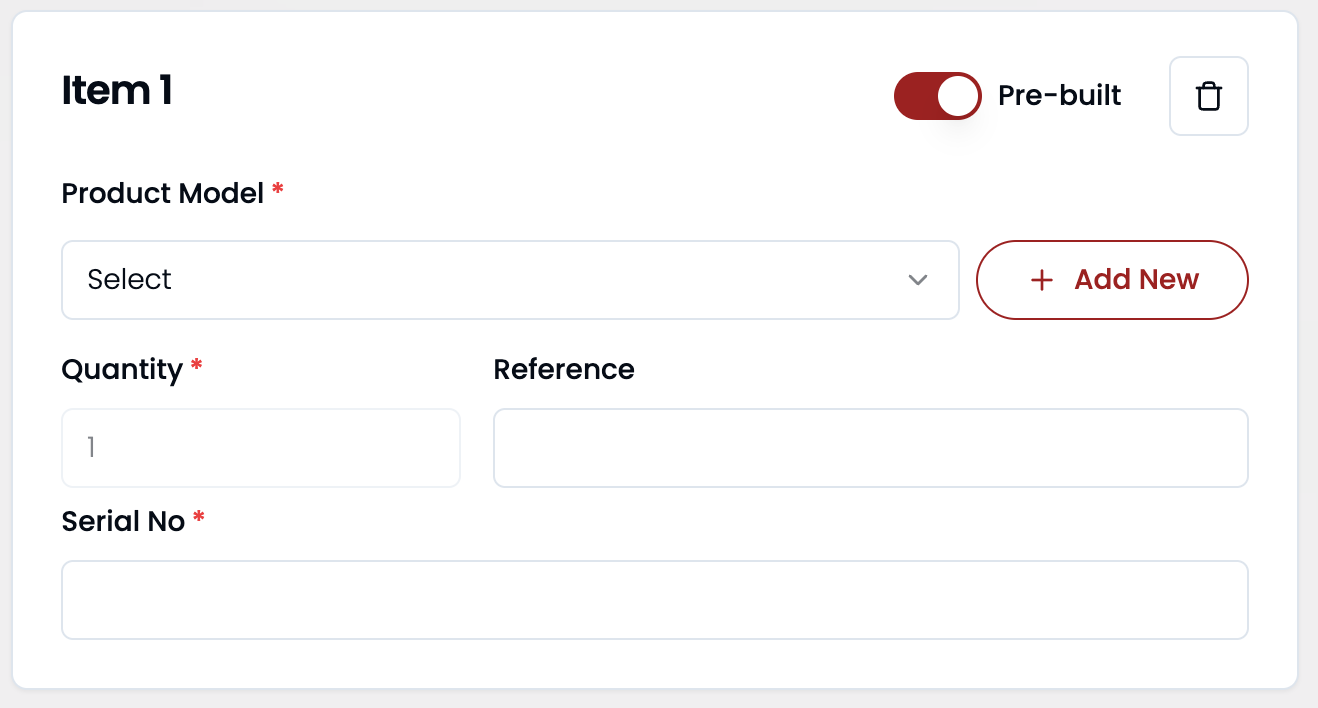
Components
Select the product model and type in the quantity of the item.
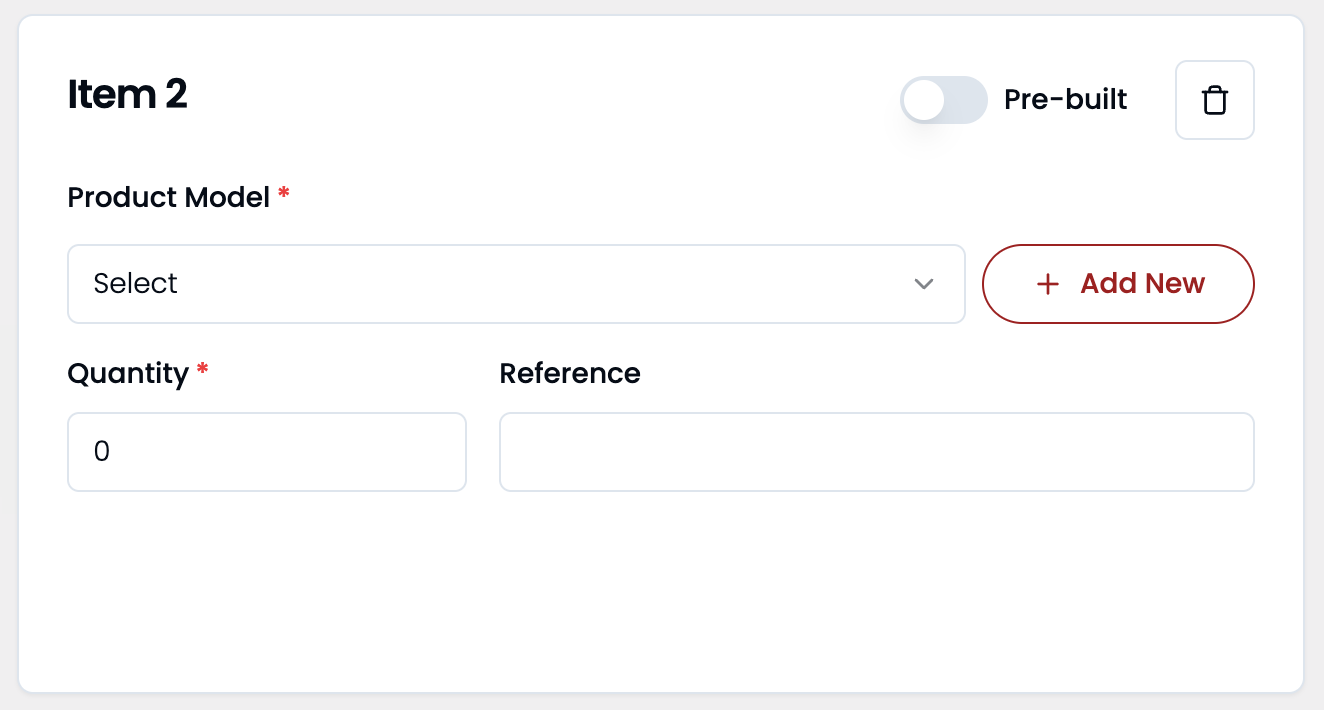
Click Submit button at the bottom when finished.
Step 5: Submit & Check
After submission, navigate back to /warehouse to check the changes. You can always click the refresh button above the table to get the latest data.